
My daughter, who has celiac disease, will be home from college soon, so I wanted to create a gluten-free version of the famous Trader Joe’s Pancake Bread just for her (since TJ’s doesn’t have a gluten-free version). Here is my gluten-free take on this delicious breakfast bread. This cross between coffee cake and quick bread highlights the flavors of a stack of buttermilk pancakes doused in pure maple syrup. Moist, rich and topped with a cinnamon streusel, it’s the ideal breakfast twist for any pancake lover!
Of course, regular all-purpose flour can be used in place of gluten-free flour if gluten isn’t an issue for you. Hope you enjoy it as much as we do!
Gluten-Free Pancake Bread
(Makes one loaf)
STREUSEL TOPPING
2 tablespoons gluten-free 1:1 flour (Bob’s Red Mill and King Arthur are great brands)
1 tablespoon light brown sugar
1 tablespoon granulated sugar
½ teaspoon ground cinnamon
1 tablespoon unsalted butter, at room temperature
PANCAKE BREAD
2 cups gluten-free 1:1 flour
½ cup granulated or light brown sugar
1 teaspoon baking soda
½ teaspoon baking powder
½ teaspoon salt
2 large eggs, at room temperature
½ cup unsalted butter, melted and slightly cooled
½ cup buttermilk, at room temperature
½ cup organic 100% pure maple syrup
1 teaspoon pure vanilla extract
Place the oven rack in the middle position of the oven. Preheat to 350 Fahrenheit. Line an 8- or 9 x 5-inch loaf pan with parchment, allowing overhang for easy removal (alternatively, coat inside of pan with nonstick cooking spray).
FOR STREUSEL TOPPING:
Combine flour, brown sugar, granulated sugar and cinnamon in a small bowl; cut in butter with a fork until mixture is crumbly.
FOR PANCAKE BREAD:
Combine flour, sugar, baking soda, baking powder and salt in a large bowl; stir well.
Combine eggs, melted butter, buttermilk, maple syrup and vanilla extract in a medium bowl; stir well. Add to the bowl with dry ingredients, and stir to combine. Spoon batter into the prepared loaf pan; sprinkle top with streusel topping.
Bake for 60 to 65 minutes or until a wooden pick inserted in the center comes out clean. Cool completely in the pan on a cooling rack. Slice and serve. Store leftovers in an airtight container at room temperature for up to 3 days. Or wrap tightly in plastic wrap or foil, place in a plastic zip-top food storage bag, and freeze for up to 3 months.
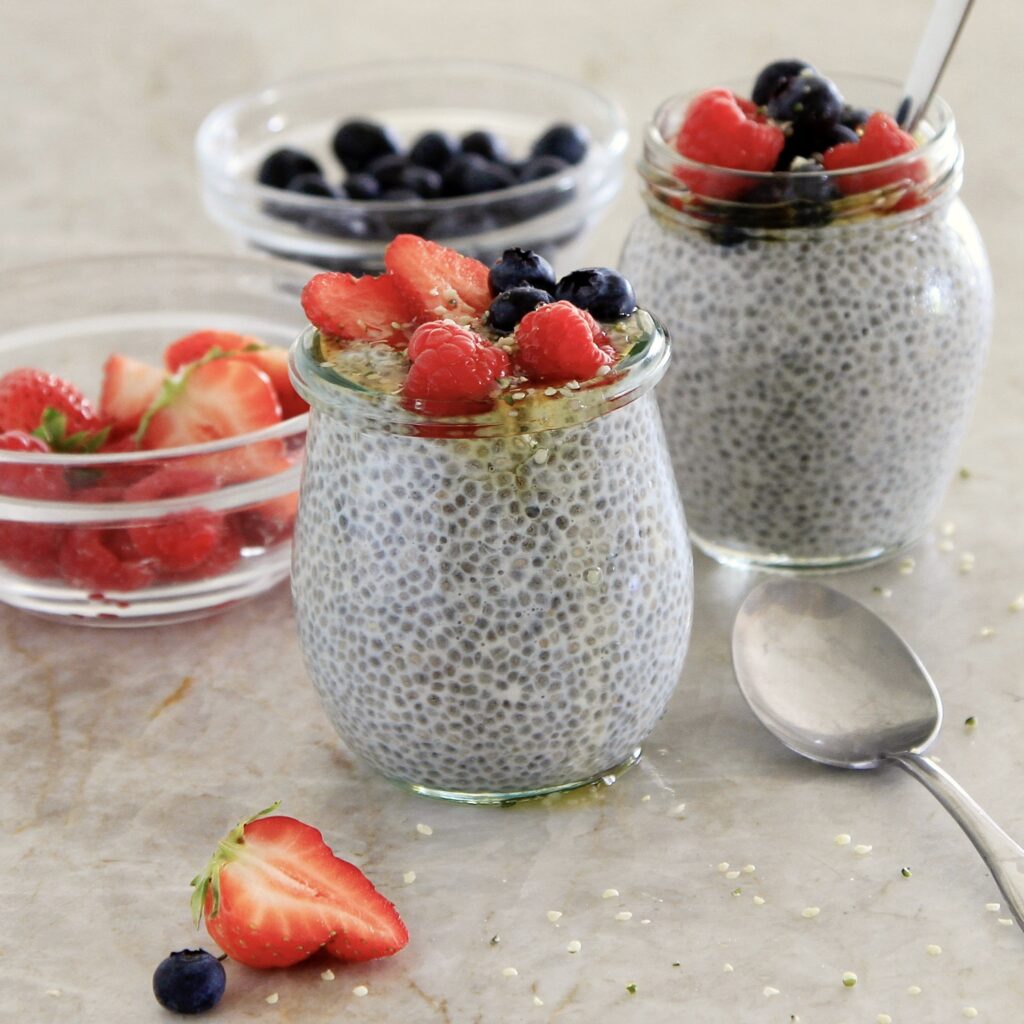
When chia seeds are combined with liquid and left to soak, they create a gel, which thickens and produces a filling, no-cook pudding. Chia, a nutritious powerhouse packed with fiber, protein and heart-healthy omega-3 fatty acids, has a neutral flavor that’s a perfect canvas for seasonal fruit toppings. Because the pudding can last for 5 days in the refrigerator, I often double this recipe for protein-packed post-workout snacks that last throughout the week.
Vanilla Chia Pudding
(Makes 2 servings)
1 cup unsweetened almond milk or milk of choice
¼ cup organic chia seeds
¼ cup organic Greek plain or vanilla-flavored yogurt
1 tablespoon organic 100% pure maple syrup
1 teaspoon pure vanilla extract
Pinch salt
Seasonal organic berries and/or chopped fresh fruit for topping
Organic shelled hemp seeds and additional pure maple syrup for topping (optional)
Combine milk, chia seeds, yogurt, maple syrup, vanilla extract and salt in a medium bowl; stir well. Let the mixture sit for 15 minutes, then stir again to break up any clumps. Divide between two small mason jars or bowls; cover and refrigerate for 4 hours or up to 5 days.
Before serving, top with berries/fruit. Sprinkle with hemp seeds; drizzle with maple syrup.
Chris Garboski managed the HQ test kitchen at Nestle and produced more than a thousand recipes in her 25 years with the company. Her proudest accomplishment has been raising triplets.